
What is High to Low Poly Workflow? How are you going to do it? What will it look like on your model? What programs will you use to create it? Continuing Modelling. So from … Continue reading

What is High to Low Poly Workflow? How are you going to do it? What will it look like on your model? What programs will you use to create it? Continuing Modelling. So from … Continue reading
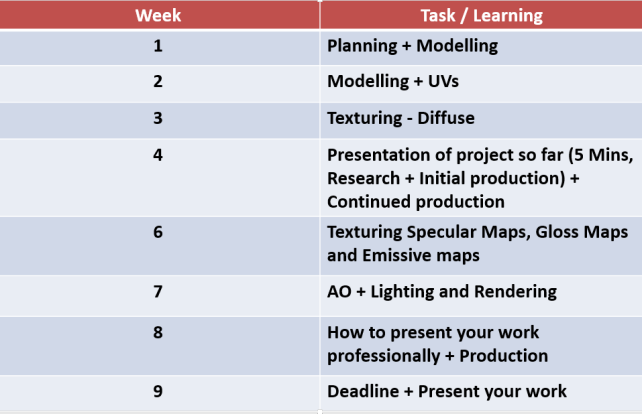
We will be starting a 9 week modelling challenge to create the best 3d model that we can.
Brief: “This model needs to show a high to low poly model which uses normal map baking.
This model will be UV mapped and textured. During this project you will also learn about Specular maps and emissive maps”
The first thing to do was to find some images of ideas that I want to model.
I chose vehicles, characters, weapons and objects.
These are the images I chose to use for my research.
In the end, I decided to chose Sonic to create my model with.
I started off in 3DS Max, but almost immediately ran into issues where the box I had created couldnt be selected and altered.
So I swapped over to Maya to create the model.
I added two reference planes so that I could use them to help create my model.
Then I added a box shape and began modelling from that.


There are a few different types of texture maps to use to creates something that looks like additional resolution or detail on the surface of geometry. Some of this detail is real and some isn’t.
First you need to make sure that your model is ready to texture. This can be done by UV Unwrapping the model first to create a UV Layout.
You can then take this layout into Photoshop and start adding the textures using photographs or paint them using the tools in the software.
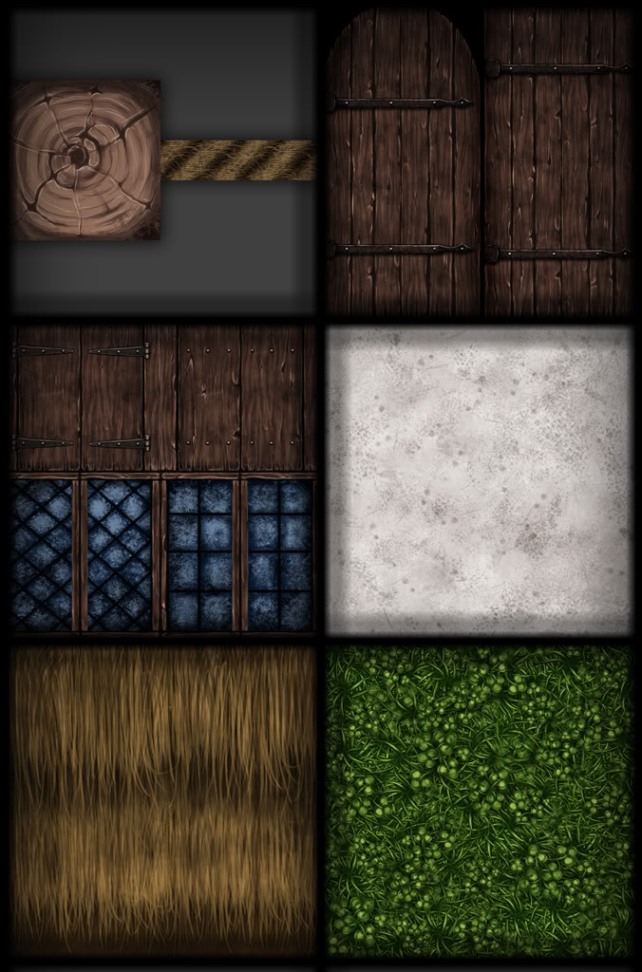
Examples of some hand painted textures.

Free Realms – Game with Hand Painted Textures
By using different types of textures, you can make either a realistic looking game, or a stylized one, such as Free Realms above, or other games such as WoW.
The different types of Texture Maps include:
The three main texture map types I am going to talk about are
Bump Maps, Normal Maps and Displacement Maps.
What is a Bump Map?
A bump map is an image that acts as a height-map, that is in greyscale. Bump maps don’t actually create geometry to the model, but they act as an illusion to make it look like there is a difference in height in certain areas of the model. By using greyscale for the map, anything above 50% grey will appear as if it is going down in the model, such as a wrinkle in skin or clothing, while anything light will appear as if it is raised up from the model.
Bump maps are used for adding detail to the model, where the actual geometry doesn’t need to be changed.

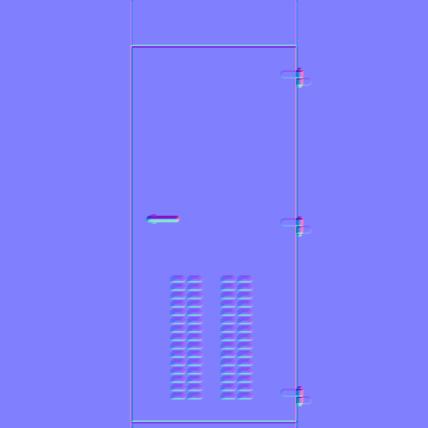
What is a Normal Map?
Instead of a greyscale image like a bump map, a normal map is basically a map of what direction your geometry’s normals are facing. Normal Maps are usually a mix of blues and purples and these work best for models that need to be animated, as the meshes can deform, for example, character animation. This is known as a Tangent Space Normal Map.
For models that dont need to be animated an Object Space Normal Map is used.
Normal Maps are used to fake lighting and are now the more modern version of a Bump Map.
Normal Maps can be created by either dragging and image into the software, where it will automatically make a map from the photograph.

Normal Map from Photograph

Normal Map Applied using Photo
Normal Map edited in Photoshop

Normal Map Applied using edited map
Displacement Maps
These types of maps physically displace the mesh to which they are applied. In order for detail to be created based on a displacement map, usually the mesh must be subdivided or tessellated so real geometry is created.
Like a bump map, a displacement map consists of grayscale values.
Displacement Maps are used to create extra geometry onto the model, displacement map is basically a height map with the primary difference between a bump and displacement being that the displacement actually affects the geometry.
Once you’ve baked them out from the high resolution mesh, you can apply the displacement to a lower resolution version of the model. This allows you to get some really high quality detail while still keeping the mesh resolution manageable for future steps in the pipeline, like rigging and animation.


Todays task was to model anything we wanted, just to practice it again after the summer holidays. I decided to model the iPhone plug that was on my table. I forgot to take screenshots during the modelling process, and only … Continue reading
Today we started making some ideas for our game jam in our bays.
The first game we came up with was a toy car racing game that would be in different rooms. This would allow us to have multiple assets and different skins for each object.
The next game idea we had was a duck racing game on water, but this then changed to a rubber duck racing game in a bath tub, and the players are able to equip weapons.
each person in the group had started creating some ideas for this game, from skin ideas, characters, concept and 3d modelling.
I started by 3D Modelling some rubber ducks.

I started off with a sphere shape and extruded out in certain places to create this blocky style rubber duck. I then added a mesh smooth onto the model and then added some basic materials onto the model to make it look like a rubber duck.


I also made a low poly style bathtub.


I have rendered out a few images of my BB-8 model within maya. I have added a normal and bump map onto the model to make him look more realistic than before. The rendered images are below.


I feel as though I have improved a lot with my modelling compared to the beginning of the year as this now looks more realistic than my older models did.

Today we were given a task to sketch ideas for either a fantasy shop or a sci-fi bedroom.
I decided to draw the fantasy shop.
Once we had these ideas, we had to sketch an object that would fit into that location, then later we would be 3D Modelling it.
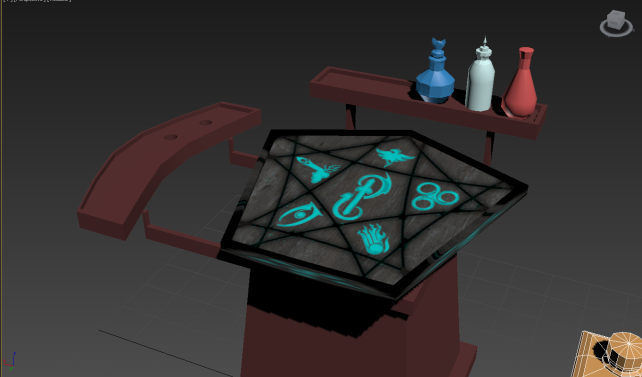
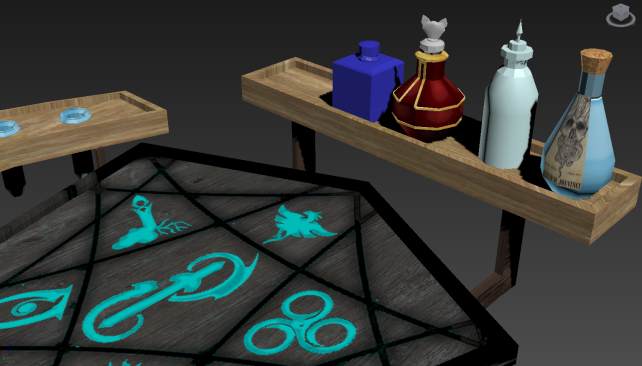
I decided to do a potion table.

I used a boolean extraction in order to get the holes in the objects to be perfect circles.
I then made some potion bottles to go onto the stand at the back of the table.


Today I added more to my WITN Environment build within Unreal engine, including a park area, which I am going to expand on more later.
I will need to do some more sketches to come up with more ideas to build the location.

In a previous lesson, we were given two hours to make a model of anything we wanted, and I made a model of Claptrap from Borderlands!


Then, I decided to reuse this model in my Unity Project!


yesterday, I started using Unreal 4 to make a basic mock up of the classroom we are going to use in our post apocalyptic game.
Since everyone is still modelling, I just started to place random objects into the room, using simple box shapes to make the shape of the room.
I forgot to take screenshots along the way, so i only have pictures of the most recent update of the room.

I originally used square boxes to resemble the seats, however, I found a pre made model of chairs so I imported them into unreal to show how everything would be laid out.
After this I started changing the lighting, trying to make it very dim, showing that it has been abandoned, then added a few visual effects into it using a thing called, Particle Systems.
Video walkthrough of most recent update of the room:

