For my Inspired Worlds essay I will be writing about the art that inspired the game Okami.
Many different art styles and environments have influenced the design of this game; from the Ukiyo-e art movement, including the art of renowned artist Hokusai, to the island of Hokkaido.
Okami Environments
“One of the things that makes Okami unique is the variety of beautiful scenery”


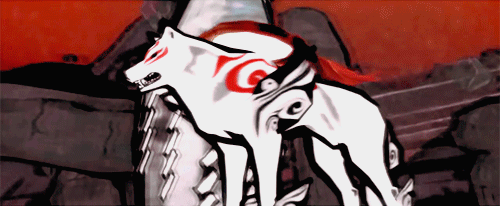
This image is from the concept art of Okami, where you can see clear references to Hokusai’s art. The hand-drawn textures is known as the ancient sumi-e style of Japanese black and white ink paintings with some of the traditional ukiyo-e style of Japanese watercolour and woodcarving print which was popularised in the late 17th Century.


The image on the left is of the forest in Okami, and the right is an Ukiyo-e painting. Both pieces of art have a very similar style to them and the game gives the impression that it has all been painted by hand, despite being heavily influenced by Hokusai’s artwork there are distinct differences between the game and the artwork such as the very thick outlines on Amaterasu. However, in terms of colours and lighting, I feel as though the Sumi-e style fits this piece of concept, due to that sumi-e artists only paint using black ink and rice paper. The artist must know how to create clean lines as they cant be erased and they must also know how to create different shades just with the black ink, this is also reflected in the game-play as the player has to use a magic paintbrush to help reveal secrets in the world of Okami.

In the capital city of Sei’an, the creators looked into the old Japanese capital of Kyoto to create their designs.
“we took ideas of what an old capital city would look like based on the Heian period (AD 794 to AD 1185) picture scrolls and various medieval works of art and paintings such as ukiyoe paintings from throughout Japan. On top of that, we added an extra layer of puzzles and hidden goodies to the capital itself, since the whole game is built around creative ways to move forward.”

Sei’an City lies in the centre of Lake Beewa, a large lake that lies in the bottom of a deep hollow, surrounded by a mountain range, separating it from other parts of Western Nippon as a natural defence. These mountains have been inspired by the mountains of Hokkaido.


The left is of some concept art from the Sei’an City, and the right is a view of a town in Hokkaido, showing the mountains in the distance.
The style of the game makes the player feel as though they are in a painting, and by using the paintbrush tool during the game the player can also contribute in a way thats engaging to them as they have to use this tool to not only progress through the story, but find hidden secrets and treasures throughout the world. Okami is a wonderful blend between reality and fantasy environments, this creates the perfect environment for this type of game, giving the player a surreal sense of exploration when traversing the fantasy versions of historical real- world locations.
Characters
As for the characters in-game, they have also been heavily influenced by the sumi-e style. They all have very simple designs and fit seamlessly into their environments which gives an extra sense of immersion, allowing the player to become even more engrossed in the world of Okami.
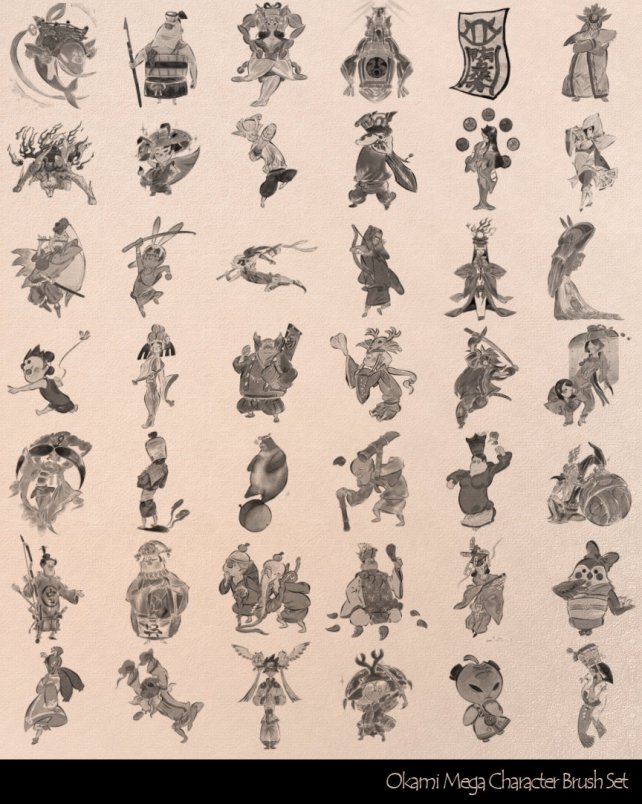
Some of the character designs from Okami
The designs above all feature the distinctive grey-scale look that Sumi-e uses. Though originally during the design stages this wasnt going to be the case. The game was originally designed to be more realistic rather than in this style as seen below.

Okami during development (left) and in game (right)
With the thick black lines around Amaterasu they give the character a look as though she is part of a painting come to life in the style of the influential artist it was inspired by. Okami’s characters are each unique enough to hold their own personality however, they still all conform to the thick-inky drawn look. that the game displays as one of its key selling points. The game boasts a large world which gives players a chance to take it easy and wander instead of following a linear path to the finish. This may inspire an adventurous feeling in the player and let them take it at their own pace which will not only make the journey longer, but each player will experience the game differently. Amaterasu is a god within Okami and is able to use special powers, making the player feel empowered and able to take on the enemies that the world of Okami will throw at the player as a challenge to not only themselves but to Okami, too.
How has The traditional art been transferred into the game?
By using software such as Photoshop to illustrate images, they can look almost identical to those originally created on rice paper using inks and then placed within the games world.
The characters can then also be given the same style of hand drawn paintings using software like Photoshop.
The artists who worked on Okami may have also made some of the artwork in the traditional Japanese way before moving into the digital versions, to get an authentic feel using traditional methods and using traditional materials. This not only gives the artists experience using such methods but it adds an extra layer of authenticity when moving to a digital format because the artist will have a firm understanding on how it is expected to look.
Below is an example of how these textures could be handpainted and applied to the in game model.


Then once the models have been created,new textures can be applied anytime, and this needed to be done when the Okami HD remaster was created. Below is an example of some older versus newer textures for Okami