Project 5: Modelling within Maya

Today we were given a task to create a vehicle within Maya. This is my first time modelling within Maya as I usually model within Max.

I went for a cartoony styled car as it would be easy to start with.

Image result for vehicle clipart

I started with a cube and added multiple edge loops to create parts that could be extruded to make the starting shape.


I had problems mainly with creating the wheels, with overlapping faces and really weird topology. The main problem with the overlapping faces was that I accidentally extruded part of the wheel twice and I didn’t realize until the faces turned a weird black colour.

To create the rounder shapes, I used bevels, but again this sometimes messed with the model so I couldnt add it to all the car.

I prefer modelling within Maya over Max, I just feel as though it is easier to use than Max, although I still do prefer to model in Autodesk Inventor over the two.

I feel as though if I learn more about Modelling within Maya, my modelling will get better, as it has improved a lot since I first started my 3D Modelling two years ago on Inventor.

VFX: Revisiting the Tetris Project

After learning how to add shadowing within the BB-8 project, I have decided to go back to the Tetris project and add shadows to that project in order to try and make it seem more believable.

I had a few problems where for some reason my image sequence took over an hour to render, then turns out that it didnt render correctly. The next error was that my compute ran out of space and I had to delete a lot of stuff in order to allow the render sequence to save.

Now that it is saved, I have exported it out into Premier pro to turn it into a video format rather than have it as over 1500 separate images.

I then added multiple effects onto the tetris blocks, the main one being a drop shadow effect, so they look more like they are there. I also added a highlight on the outside of the blocks in the direction that the light is in, again to make them seem more believable.


Class Game Jam: Ideas

Today we started making some ideas for our game jam in our bays.

The first game we came up with was a toy car racing game that would be in different rooms. This would allow us to have multiple assets and different skins for each object.

The next game idea we had was a duck racing game on water, but this then changed to a rubber duck racing game in a bath tub, and the players are able to equip weapons.

each person in the group had started creating some ideas for this game, from skin ideas, characters, concept and 3d modelling.

I started by 3D Modelling some rubber ducks.

duck1.png

I started off with a sphere shape and extruded out in certain places to create this blocky style rubber duck. I then added a mesh smooth onto the model and then added some basic materials onto the model to make it look like a rubber duck.

duck2duck3duck4

I also made a low poly style bathtub.

bath1.png

Art Fundamentals: Fantasy Shop

Today we were given a task to sketch ideas for either a fantasy shop or a sci-fi bedroom.

I decided to draw the fantasy shop.

Once we had these ideas, we had to sketch an object that would fit into that location, then later we would be 3D Modelling it.

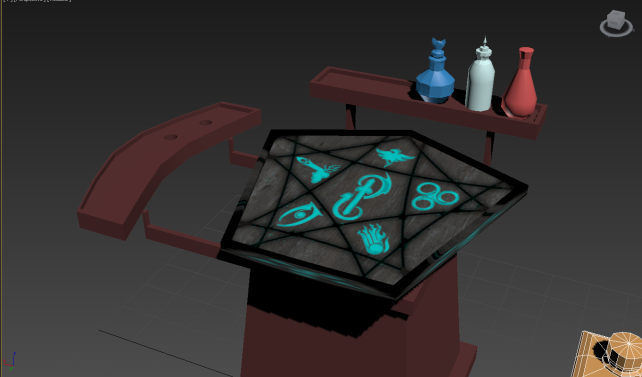
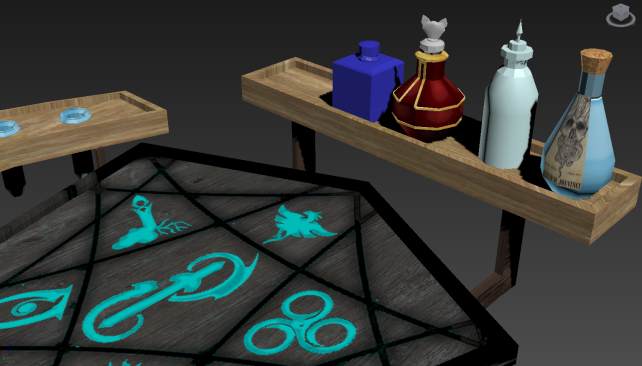
I decided to do a potion table.


potion1.png

I used a boolean extraction in order to get the holes in the objects to be perfect circles.

I then made some potion bottles to go onto the stand at the back of the table.

potionbottles1.png

potion1.png

wat.png

wat.png

Wolf In The Night: Problems

Today I did another few tests runs in Unreal engine and stumbled upon a few problems with some of the imported models, some of them had missing pieces, or really, really weird textures that looked terrible.

weird textures.png

Around the back of two of the buildings, for some reason you could see straight through the doors, not sure why this has suddenly started happening,but I will have to model these.

On one of the other models, the abandoned shop, parts of the model were missing, and I couldnt even select them in the editor mode so I have no idea what is going on.

And finally, the textures on the jeep..these were fine the last time I ran through this and now they are just horrible.

I am going to try and fix these as soon as I can as they are making the game look bad.

Wolf In The Night: Environment Test #3

Today I added more to my WITN Environment build within Unreal engine, including a park area, which I am going to expand on more later.

I will need to do some more sketches to come up with more ideas to build the location.

3D Model Challenge! Claptrap

In a previous lesson, we were given two hours to make a model of anything we wanted, and I made a model of Claptrap from Borderlands!


Then, I decided to reuse this model in my Unity Project!

Animation Software: MMD

MMD(MikuMikuDance) isĀ one of the animation software programs that I have used to animate 3D Models.

MikuMikuDance, very commonly abbreviated to MMD, is a proprietary freeware animation program that lets users animate and create 3D animation movies, originally produced for the Vocaloid character Hatsune Miku.”

(main screen of MMD)

The positioning of the 3D figures can be easily altered, the facial expressions can be altered (as long as the model has morphs to use), and motion data can be applied to the model to make it move. Along with these functions for models, accessories, stages, and backgrounds can be added to create an environment, and effects such as lens flares and AutoLuminous (an effect that makes things glow and light up) can be applied as long as the MikuMikuEffect (MME) plugin is installed into the interface. Sound and music can also be added to create music videos, short films, and fan-made stories. The motion data used to animate the characters and the pose data mainly used for making screenshots can be exported as .vmd (Vocaloid Motion Data) files and .vpd (Vocaloid Pose Data) files, respectively. The exported files can then be imported into other projects made with software that can use the file types. This allows users to share the data with other users.

The user can then either produce or download their own Polygon Models online and then either make or download motion data, which is added to the models in order to make them move.

The gif below shows me adding a motion data to a pre-installed model.

Once you have added Motion data, the models that you require, lighting, background and other objects, you can make videos like one I had made a while ago and uploaded to YouTube:

However with video, I wasnt too sure on how to work the camera properly, and since it has been over a year since I have used the program, I am still unsure of how to use the camera properly, so I will improve and learn how to do this properly.


But with the correct amount of practice, videos can be made to look like this one that I found online: