Creative and Technical Modelling: Update

I havent updated a blog on this project in a couple of months, so I will do a quick update post.

As there wasnt many changes in the model during some lessons as I was just fixing certain parts, I felt as though I didnt need to post a blog just to say one thing, and I wanted to wait to do one big blog post.

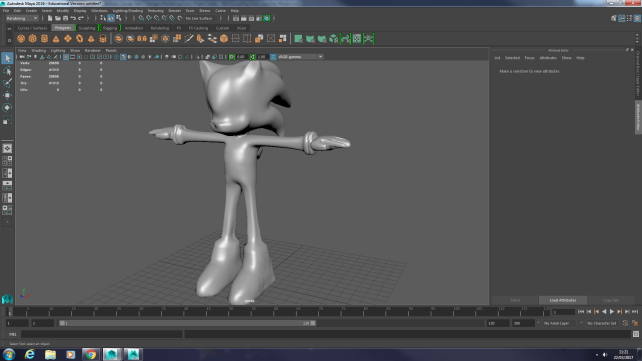
I took my sonic model into Mudbox to add more details to the model.

However, I then realised that my Maya model was wrong in a lot of places, such as his face being too long, the wrong amount of spikes on his back, the spikes on his head were too long and his body was too big.

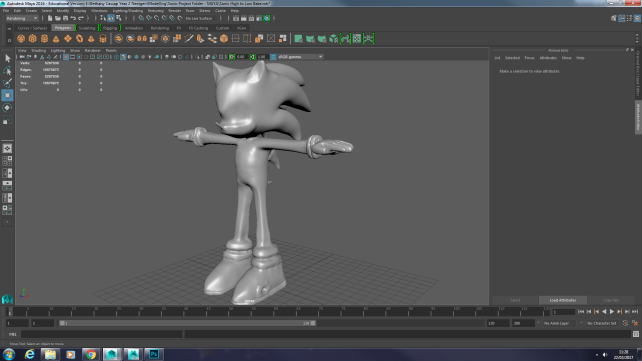
So I resculpted it all within Mudbox, to create a more accurate model.

I then exported both the high poly sonic and the lower poly sonic into maya to bake.

sonic1


sonci2

sonic3


With the baking, I had a lot of problems yesterday with Maya constantly crashing everytime I tried to bake anything.

One of the issues was that I forgot to UV the low poly model, and then I optimized the scene, removing junk from the software that wasnt needed, this allowed the Maya to get the UVs sorted straight away without crashing.
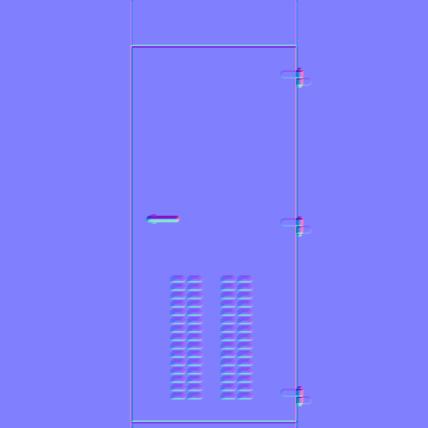
 

sonic4

Envelope


sonic5

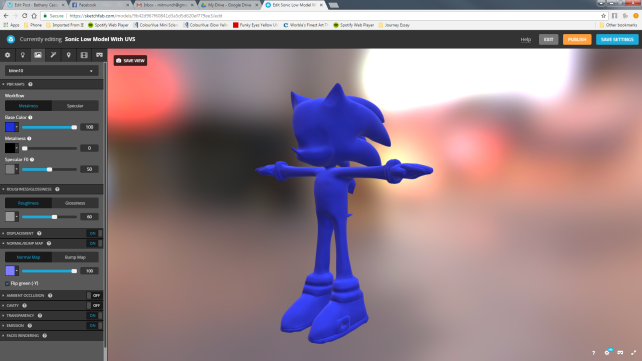
Baked Normal Map on Low Poly Model

The texture looks really odd in maya, we then baked this texture within Substance painter, the textures looked normal, then also on sketchfab, the map looked normal, so it may just be an issue with Maya making it look strange.

sonic6.png

sonic 7.png

After this, we then imported the model into Mudbox to see if it was just Maya, but then mudbox started having issues as well, it was unable to detect the normal map.

So after searching through the internet for a while, I managed to sort out getting the normal map to show on the model.

sonic8

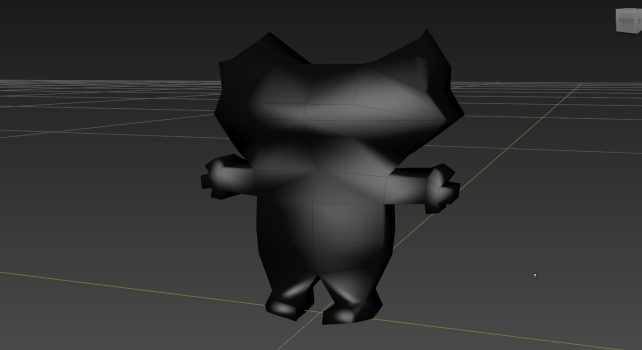
Normal Map on Model – Mudbox

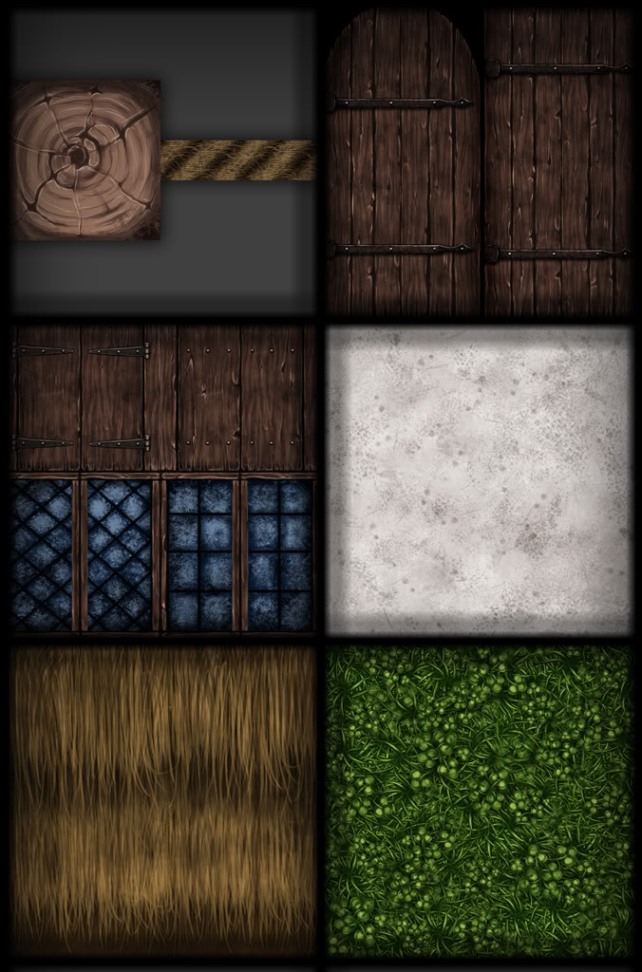
The next thing to do now was to paint the model.


Creative and Technical Modelling: Research and Beginning the Model

We will be starting a 9 week modelling challenge to create the best 3d  model that we can.

Brief: “This model needs to show a high to low poly model which uses normal map baking.

This model will be UV mapped and textured. During this project you will also learn about Specular maps and emissive maps”

Untitled-2.png


The first thing to do was to find some images of ideas that I want to model.

I chose vehicles, characters, weapons and objects.

These are the images I chose to use for my research.

This slideshow requires JavaScript.

In the end, I decided to chose Sonic to create my model with.


I started off in 3DS Max, but almost immediately ran into issues where the box I had created couldnt be selected and altered.

So I swapped over to Maya to create the model.

I added two reference planes so that I could use them to help create my model.

Then I added a box shape and began modelling from that.

Untitled-3.png

Untitled-3.png

Framestore 3D Modelling Challenge: Bulbasaur

We received a task from Framestore as part of ‘Celebrate Your Unique Talent Day’ to create a 3D model.

“We would give the students 2 hours and the only rule is that they have to start from a sphere, no pre-made models allowed.”

PLACEHOLDER BLOG POST – INCOMPLETE POST

bulba2bulbasaur_bethanycassap_thumbbulbs


Mudbox: Adding Surface Detail

Today we are adding surface detail to a character within Mudbox. To do this,we have unwrapped the model and then we will be adding surface detail to the model in a high poly state, before baking it then moving it … Continue reading

Difference in Texture Mapping

There are a few different types of texture maps to use to creates something that looks like additional resolution or detail on the surface of geometry. Some of this detail is real and some isn’t.

First you need to make sure that your model is ready to texture. This can be done by UV Unwrapping the model first to create a UV Layout.

You can then take this layout into Photoshop and start adding the textures using photographs or paint them using the tools in the software.

zv_hp_textures_03

Examples of some hand painted textures. 

free-realms

Free Realms – Game with Hand Painted Textures

By using different types of textures, you can make either a realistic looking game, or a stylized one, such as Free Realms above, or other games such as WoW.

The different types of Texture Maps include:

  • Projection Painting
  • Colour Maps
  • Bump Maps
  • Normal Maps
  • Displacement Maps
  • Specular Maps
  • Mask Maps
  • Texture Tiling

The three main texture map types I am going to talk about are

Bump Maps, Normal Maps and Displacement Maps.


What is a Bump Map?

A bump map is an image that acts as a height-map, that is in greyscale. Bump maps don’t actually create geometry to the model, but they act as an illusion to make it look like there is a difference in height in certain areas of the model. By using greyscale for the map, anything above 50% grey will appear as if it is going down in the model, such as a wrinkle in skin or clothing, while anything light will appear as if it is raised up from the model.

Bump maps are used for adding detail to the model, where the actual geometry doesn’t need to be changed.

bump-map


What is a Normal Map?

Instead of a greyscale image like a bump map, a normal map is basically a map of what direction your geometry’s normals are facing. Normal Maps are usually a mix of blues and purples and these work best for models that need to be animated, as the meshes can deform, for example, character animation. This is known as a Tangent Space Normal Map.

For models that dont need to be animated an Object Space Normal Map is used.

Normal Maps are used to fake lighting and are now the more modern version of a Bump Map.

Normal Maps can be created by either dragging and image into the software, where it will automatically make a map from the photograph.

rustutilitydoor_local

Normal Map from Photograph

the colourmap applied over the normalmap generated from the photograph

Normal Map Applied using Photo

door_template_local

Normal Map edited in Photoshop

the colourmap applied over the normalmap generated from the heightTemplate

Normal Map Applied using edited map

Displacement Maps

These types of maps physically displace the mesh to which they are applied. In order for detail to be created based on a displacement map, usually the mesh must be subdivided or tessellated so real geometry is created.

Like a bump map, a displacement map consists of grayscale values.

Displacement Maps are used to create extra geometry onto the model,  displacement map is basically a height map with the primary difference between a bump and displacement being that the displacement actually affects the geometry.

Once you’ve baked them out from the high resolution mesh, you can apply the displacement to a lower resolution version of the model. This allows you to get some really high quality detail while still keeping the mesh resolution manageable for future steps in the pipeline, like rigging and animation.

Displacement-Maps

Project 7: Introduction to Mudbox

Today we exported our models from Maya into Mudbox to start sculpting them more.

pictre7.png

When I first imported my mesh into Mudbox, It was covered with Red lines indicating that there was a problem with it. So I went back into Maya and fixed the model, as there was multiple extra vertices that needed to be connected and some faces that weren’t attached to anything.

After doing this,I re-imported Lucious into Mudbox and this has fixed it.

pictyure8.png

I have found that I prefer using Mudbox as a modelling tool compared to Maya and Max, it feels a lot more like I am in control of making the model.

9.png

I added multiple sub-divisions to add more polygons to Lucious’s mesh, which has allowed me to sculpt shapes easier.

10.png

I am currently adding some wings and his tail to the back of the model, but I feel as though this may have been better to have been added within Maya first rather than sculpt them straight into the mesh in Mudbox.

The Images below are the different sub-division levels of polygons that I have modeled with.

This slideshow requires JavaScript.

I then went on and decided to play around with the paint tools to see what that would be like.

1.png

If this is how you texture models within Mudbox, I much prefer to be able to paint onto the model rather than having to create textures like in 3DS Max.