
There are a few different types of texture maps to use to creates something that looks like additional resolution or detail on the surface of geometry. Some of this detail is real and some isn’t.
First you need to make sure that your model is ready to texture. This can be done by UV Unwrapping the model first to create a UV Layout.
You can then take this layout into Photoshop and start adding the textures using photographs or paint them using the tools in the software.
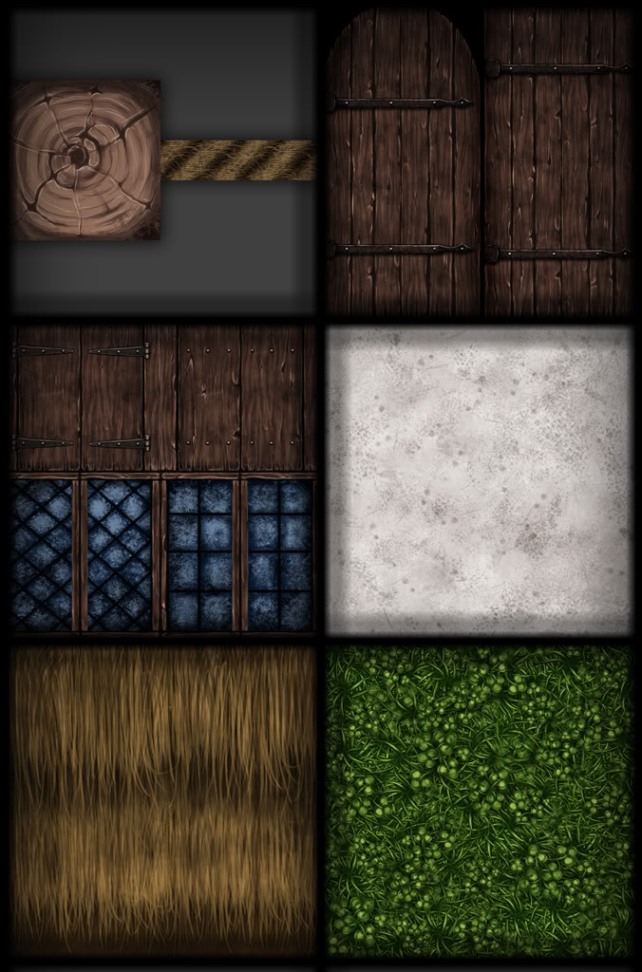
Examples of some hand painted textures.

Free Realms – Game with Hand Painted Textures
By using different types of textures, you can make either a realistic looking game, or a stylized one, such as Free Realms above, or other games such as WoW.
The different types of Texture Maps include:
- Projection Painting
- Colour Maps
- Bump Maps
- Normal Maps
- Displacement Maps
- Specular Maps
- Mask Maps
- Texture Tiling
The three main texture map types I am going to talk about are
Bump Maps, Normal Maps and Displacement Maps.
What is a Bump Map?
A bump map is an image that acts as a height-map, that is in greyscale. Bump maps don’t actually create geometry to the model, but they act as an illusion to make it look like there is a difference in height in certain areas of the model. By using greyscale for the map, anything above 50% grey will appear as if it is going down in the model, such as a wrinkle in skin or clothing, while anything light will appear as if it is raised up from the model.
Bump maps are used for adding detail to the model, where the actual geometry doesn’t need to be changed.

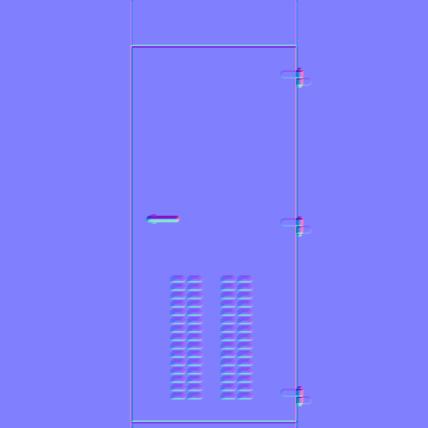
What is a Normal Map?
Instead of a greyscale image like a bump map, a normal map is basically a map of what direction your geometry’s normals are facing. Normal Maps are usually a mix of blues and purples and these work best for models that need to be animated, as the meshes can deform, for example, character animation. This is known as a Tangent Space Normal Map.
For models that dont need to be animated an Object Space Normal Map is used.
Normal Maps are used to fake lighting and are now the more modern version of a Bump Map.
Normal Maps can be created by either dragging and image into the software, where it will automatically make a map from the photograph.

Normal Map from Photograph

Normal Map Applied using Photo
Normal Map edited in Photoshop

Normal Map Applied using edited map
Displacement Maps
These types of maps physically displace the mesh to which they are applied. In order for detail to be created based on a displacement map, usually the mesh must be subdivided or tessellated so real geometry is created.
Like a bump map, a displacement map consists of grayscale values.
Displacement Maps are used to create extra geometry onto the model, displacement map is basically a height map with the primary difference between a bump and displacement being that the displacement actually affects the geometry.
Once you’ve baked them out from the high resolution mesh, you can apply the displacement to a lower resolution version of the model. This allows you to get some really high quality detail while still keeping the mesh resolution manageable for future steps in the pipeline, like rigging and animation.


